Posted on 12, July, 2023
Last Modified on 17, July, 2023
Do you need to showcase advertisements, posters, artwork, or other printed materials? Do you want your displays to look professional and be adaptable? If you answered yes to both questions, then let us welcome you to the world of snap frames, where effortless display changes and professional presentations become a reality.
What is a Snap Frame?

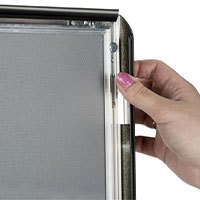
A snap frame, also known as a clip frame, is a type of frame commonly used to showcase printed materials. It is designed to provide an easy and convenient way to change and secure your material quickly without having to remove the frame from the wall or its base. These versatile display tools feature hinged edges equipped with spring-loaded snaps that allow you to open the frame from the front. The front of the frame is protected by a transparent screen to secure your print material from dust, moisture, or potential damage. Snap frames are immensely popular in retail stores, educational institutions, public spaces, and offices, supplying a sleek and polished appearance to exhibit information, promotions, and visuals.
So, How Does a Snap Frame Work?
These innovative frames are easy to use and incredibly user friendly. The following steps will provide you with the tools to make the most out of your snap frame display:

Step One: Choose a snap frame that appropriately fits the dimensions of your sign or poster. If you already have a snap frame, make sure to print your material to fit the size of the frame. Just like a picture frame, you’d select the size for 4” x 6”, 8.5” x 11”, etc.
Step Two: Open the snap frame. Gently lift the edges to release the snaps that provide you access to the front cover of the frame. If you are wall mounting your frame, utilize the hidden holes included inside the edges. You can hang these frames in either orientation: portrait or landscape.
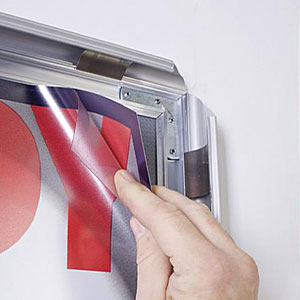
Step Three: Remove the protective screen by sliding it out or lifting it from the frame. Our snap frames each include a non-glare PVC screen that allows your content to be viewed from all angles. Once the screen is removed, you can add and then position your material to your desired preferences. After you’ve added your content, replace the protective screen over it. Ensure it fits adequately and covers the entire front surface of your material.
Step Four: Close the edges of your snap frame. Gently press down on the edges until you hear a click. Depending on the snap frame model you chose, you may have wall mounted your frame back in step 2, but if you have an easel or a floorstanding snap frame instead, then place your frame in your desired location.
Step Five: Updating or replacing your content. In the future, when you need to update your material, simply follow steps two through four. Open the frame, remove the screen, replace your material, replace the screen, and close the frame. And voilà! You’ve mastered the snap frame.
Embrace Effortless Displays: Frame your Success with a Click
Mastering the art of displays is now an effortless venture when equipped with the versatile display solutions, snap frames. No matter what size, color, or style you need, at Displays2go we have a snap frame that fits your preferences. Check out our selection of wall frames, floor stands, hanging frames, and outdoor displays that all use innovative snap frames. Embrace the power of the snap frame, present your creativity to capture audience attention and make a lasting impression. With snap frames, your display becomes a home for all of your signage for years to come.